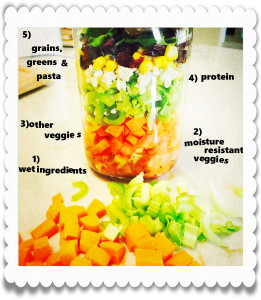
 When you are a busy family, it’s hard to find the time to pack your kid’s lunches and then your lunch. Here is a great lunch if you are on the go and you can make it the night before. Fill up a mason jar with all of your favorites like: veggies, cheese, turkey, marinated chicken, celery, carrots, red onion, romaine hearts, spring mix, spinach, hard boiled eggs, corn, and the list can go on and on. I think the best way to approach salad in a jar is to use what you have on hand.
The salad dressing will go in first, then you can build your salad from there. In this salad in a jar I added: tomatoes, carrots, celery, gorgonzola cheese, corn, cranraisins and spring mix salad. Then when you are ready to have lunch, shake and eat! You can eat right out of the jar or pour onto a plate. I like to add some extra lettuce for more crunch. This was a winning combination of flavors. The choices are limitless though. Here are some suggestions:
Spinach Salad – organic baby spinach leaves, hard boiled eggs, turkey bacon, cranraisins, tomatoes, strawberries, and poppyseed or vadalia onion dressing.
Romaine Salad – corn, shredded carrots, cheddar cheese, honey roasted turkey, golden raisins, and red onions with a light vinaigrette.
Go GREEK! – romaine hearts, tomatoes, cucumbers, red & green peppers, black olives, marinated chicken and red onion with red wine vinegar and a touch of olive oil.
Kale Yeah!– Organic curly Kale leaves drizzle with olive and lemon to soften leaves, corn, cranraisins, chick peas (my favorite!!!!!), chunks of your favorite cheese, and a lemon vinaigrette.
Cobb Salad – Romaine or iceberg lettuce, diced hard boiled eggs, bacon, blue cheese, avocado, tomatoes and a creamy dressing.
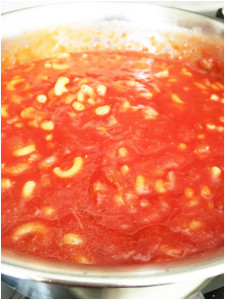 I understand what it’s like to be a busy mom. I am running all day long. When the kids come in from dance or sports they are so hungry! Some nights you just want an easy and nutritious meal with not a lot of steps or ingredients. My Pasta Fagioli recipe will not disappoint. This is best served fresh. It will take you roughly 15 minutes to prepare and 40 minutes to simmer. The kids will devour it! Easy, delicious and nutritious – what more could you ask for!!!?????
 I understand what it’s like to be a busy mom. I am running all day long. When the kids come in from dance or sports they are so hungry! Some nights you just want an easy and nutritious meal with not a lot of steps or ingredients. My Pasta Fagioli recipe will not disappoint. This is best served fresh. It will take you roughly 15 minutes to prepare and 40 minutes to simmer. The kids will devour it! Easy, delicious and nutritious – what more could you ask for!!!?????
