 Once you learn how to make pasta dough by hand, making ravioli or even tortellini is super easy. I hope you read through my post on Pasta Making 101, because it will teach you how to make the dough. My dough is made without egg, and it holds together perfectly. Practice makes perfect. My son who is 10 has become a pro, but it took a few tries.
Step One: Follow my dough recipe, then instead of making the pasta and cutting the sheets into long fettucini or linguini-like strands, cut the sheets into thick long stripes, and then into squares. It’s best to use a pastry cutter to get precise cuts, but the squares do not have to all be the same size. You may use a ravioli stamp as well, which creates more filling and less of a rim.
Step Two: Then fill every other square with a filling like a ricotta cheese mixture. You can create so many possibilities: ricotta with spinach, or ricotta with broccoli, ricotta with parsley and seasonings. What you put inside is all based on your personal preference. I like the ricotta mixture with the parsley, and herbs, and salt and freshly grated parmesan cheese. Once you mix your filling, taste it to be sure you don’t need anymore salt, pepper or seasonings. The filling will be the focal point of the ravioli, so you want to create a creamy and delicious filling. You may add an egg to bind the mixture. I skip it because my son is allergic. I cannot emphasize enough, that you use fresh parmesan cheese that you grate yourself. It does make a difference.
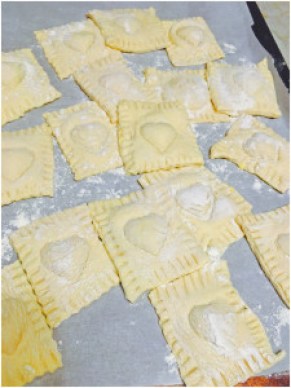
Step Three: Use a large plastic bag and fill it with your ricotta mixture and snip off one corner. Be sure the bag is sealed at the top too. You will pipe your filling onto every other square. Then put one square on top of the other, one with filling and one without filling, and sandwich them together. Then seal the edges using a fork and making indentations all the way around the square. You can wet the fork a little if you’d like. They will be sealed and the filling will stay inside the ravioli. Then if you want precise edges use a pastry cutter to trim all the way around. Alternatively, you may keep the pasta in long sheets and pipe a dollop two inches apart and fold over the top sheet. Then use the ravioli stamp.
Step Four: Put the ravioli on a lined cookie sheet with flour so they don’t stick and be sure they are not touching. You can freeze them on the tray, once frozen solid, transfer to a Ziploc freezer bag. You can freeze up to one day, otherwise I have read that the ricotta cheese might get gritty. Toss them in boiling water either frozen or fresh and give it a stir so they don’t stick. BUT before you add them to the water be sure your water has lots of salt to flavor the pasta!!!! You want to choose a large pot to be sure they have lots of room to move around, and don’t let the water get to a rolling boil, because it will break apart the ravioli. After 4-6 minutes, they will rise to the top and you can fish them out with a wire mesh ladle. Don’t pour into a colander, they will break apart. Test one and taste it. You don’t want the ricotta to appear curdled, if it does you cooked it too long so adjust your time.
Step Five: Add your desired sauce and serve warm! YUM
Here are the steps in picture order:


